Cara partisi tanpa menggunakan fdisk ini hanya bisa di lakukan apabila di komputer anda masih ada sisa harddisk yang belum masuk ke ruang drive partisi di komputer anda/sudah ada bekas partisi drive yng telah di hapus,Cara menghapu partisi tanpa menggunakan FDISK sudah pernah saya bahas di posting yang lalu.
Jika anda sudah memenuhi persyaratan di atas maka anda siap untuk membuat partisi.
Langkah-langkahnya adalah sebagai berikut:
1.Klik start
2.Klik run
3.Ketik compmgmt.msc
4.Klik disk management
5.Klik kanan drive yang berwarna hijau(partisi drive yang pernah anda hapus)
6.Klik new logical drive
7.Atur kapasitas yang anda inginkan,setelah itu klik OK.
8.Sekarang anda sudah mendapat partisi yang baru
5.05.2010
Anda memiliki masalah dengan komputer anda yang semakin hari semakin lemot?di tambah anda tidak punya uang untuk membeli RAM tambahan/sedang berhemat,Jangan khawatir karena di sini saya akan membahas tentang bagaimana cara menambah kapasitas RAM tanpa harus membeli RAM yang baru.
Langkah-langkahnya sebagai berikut:
1.Pasangkan flashdisk ke komputer
2.Klik kanan pada My Computer lalu pilih Properties
3.Klik tab Advanced, lalu klik tombol Settings pada kotak Performance
4.Pada jendela yang muncul, klik tab Advanced lalu klik tombol Change pada kotak Virtual memory
5.Pilih drive C, kemudian pilih No paging file. Jika sudah lanjutkan dengan mengklik tombol Set
6.Pilih drive 'flashdisk' anda (misalkan drive F), biasanya diberi nama Removable disk jika anda belum memberi nama pada flashdisk tersebut. Setelah itu pilih System managed size dan dilanjutkan dengan mengklik tombol Set
7.Perhatikan pada kotak Total paging file size for All drives. Nilai Recommended nya jangan melebihi kapasitas flashdisk
8.Jika memang lebih maka anda bisa memasukkan 'nilai total' dari kapasitas flashdisk. Caranya klik pilihan Custom Size lalu pada Initial Size dan
9.Maximum Size diisi dengan nilai total dari kapasitas flashdisk. Anda harus menyisakan 5 - 6 Mb. Ini merupakan persyaratan dari Windows XP itu sendiri. Jika sudah, klik tombol Set
10.Klik OK lalu Restart komputer
Sebenarnya masih ada cara lain yaitu menggunakan eBoostr tapi saya tidak membahas itu karena jika anda mendownload aplikasinya secara gratis ada kemungkinan saat anda menginstall aplikasi tersebut anda malah mendapat virus.
5.03.2010

Bagi anda yang menyenangi desain-desain permainan kilauan cahaya sepertinya brush yang satu ini menjadi wajib untuk di koleksi, plasma flame brush. Bermain-main dengan kilauan cahaya dalam gelapnya ruangan. Ya, tidak usah berlama-lama lagi, langsung saja silahkan download di sini …
http://hotfile.com/dl/33354621/070984c/Plasma_Flames_Brushes.rar.html

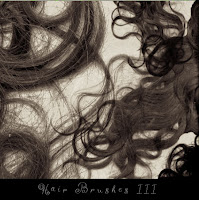
Rambut anda botak? Atau tidak ada sehelaipun? Ada tapi tidak menarik?? Jujurlah saja.
http://www.deviantart.com/download/24932893/JS_scully7491_hairbrushesIII.zip

HOTFILE
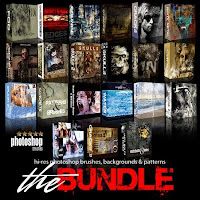
http://hotfile.com/dl/36141991/42c86e9/Rons.Brush.Collection.for.Adobe.Photoshop.part1.rar.html
http://hotfile.com/dl/36142132/8a66744/Rons.Brush.Collection.for.Adobe.Photoshop.part2.rar.html
http://hotfile.com/dl/36142172/60fca5f/Rons.Brush.Collection.for.Adobe.Photoshop.part3.rar.html
http://hotfile.com/dl/36142417/1bc2dd9/Rons.Brush.Collection.for.Adobe.Photoshop.part4.rar.html
http://hotfile.com/dl/36142611/8d204ff/Rons.Brush.Collection.for.Adobe.Photoshop.part5.rar.html
http://hotfile.com/dl/36142626/1f4c550/Rons.Brush.Collection.for.Adobe.Photoshop.part6.rar.html
Password : Upload by Jokymoon
5.02.2010

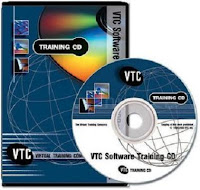
Photoshop, the de facto graphics application in the world of print design, turns its sights on web design! In this course, Geoff Blake will demonstrate many practical and useful techniques for working with Photoshop in a web design capacity. You'll learn the fundamentals of web design, including HTML and CSS basics, the challenges of web browsers, and how monitor resolution affects design. Geoff will also demonstrate how to coordinate Photoshop and Dreamweaver so that you can edit layout images in Photoshop. You'll master Photoshop selections, how to use layers to organize your layouts, and how color works in an online environment.
Finally, you'll construct an entire layout from scratch in Photoshop and discover techniques for exporting it for online use. To begin learning today, simply click on the movie links.
Introduction & Setting Up
Welcome & About this Course (01:58)
The Role of Photoshop in Web Design (01:30)
Working with Photoshop & Dreamweaver (03:38)
Internet & Web Design Fundamentals
How Web Delivery Works (02:59)
Web Browsers (04:20)
Understanding HTML & CSS (03:11)
Web Page Structure (04:30)
Monitor Resolution (02:54)
Photoshop Basics
Setting Photoshop Preferences pt. 1 (03:25)
Setting Photoshop Preferences pt. 2 (04:10)
Setting Photoshop Preferences pt. 3 (02:48)
Exploring the Photoshop Toolbox (04:07)
Tool Settings on the Options Bar (02:22)
Photoshop Application Bar (02:26)
Exploring the Panels (04:28)
Touring the Document Window (04:11)
Working More Efficiently pt. 1 (04:23)
Working More Efficiently pt. 2 (03:02)
Getting Around
Navigating Through Images (05:26)
Creating New Images (03:03)
Using Grid/Guides/Rulers (06:06)
Saving Your Work (04:41)
Understanding Web File Formats
Raster vs. Vector (02:29)
Web Graphic File Formats (03:25)
Basic Image Optimization for GIF (05:01)
Saving a Transparent GIF (02:51)
Basic Image Optimization for JPEG (04:30)
Basic Image Optimization for PNG (03:18)
Resizing Images for Web Output
Understanding Resolution (04:44)
Touring the Image Size Dialog (02:34)
Resizing Fundamentals (05:14)
Working with Selections
Shape-Based Selections pt. 1 (05:40)
Shape-Based Selections pt. 2 (02:32)
Transforming Selections (04:36)
Color-Based Selections pt. 1 (04:43)
Color-Based Selections pt. 2 (03:49)
Using Quick Mask Mode pt. 1 (02:47)
Using Quick Mask Mode pt. 2 (02:34)
Using Quick Mask Mode pt. 3 (03:43)
Saving & Reusing Selections (02:35)
Editing Alpha Channels (04:40)
Organizing Web Projects with Layers
Understanding How Layers Work (05:35)
Removing Objects from Backgrounds (04:13)
Combining Images Together (03:03)
Using Free Transform (02:31)
Organizing with Layers (03:22)
Opacity & Blending Modes (03:32)
Special Effects with Layer Styles (04:48)
Creating Web 2.0 Buttons pt. 1 (04:19)
Creating Web 2.0 Buttons pt. 2 (02:41)
Typesetting Fundamentals (04:52)
Type on the Web (04:47)
Understanding Styles (04:48)
Creating a Website Header pt. 1 (04:41)
Creating a Website Header pt. 2 (06:59)
Creating a Website Header pt. 3 (06:24)
Color on the Web
Understanding Color Modes (05:27)
Mixing & Specifying Colors (05:11)
Using Web Safe Colors (05:35)
Using Color Between Applications (05:38)
Optimizing Images
Optimizing Images as GIFs (06:29)
Creating GIF Animation (04:35)
Optimizing Images as JPEGs (03:13)
PNGs with Alpha Transparency pt. 1 (04:55)
PNGs with Alpha Transparency pt. 2 (03:33)
Creating Backgrounds & Textures
Background Techniques (04:25)
Tiling Background Examples (05:36)
Creating Gradient Backgrounds (04:24)
Building a Full Layout
What We Will Build (02:22)
Laying Out the Guides (04:39)
Creating the Main Layout Blocks pt. 1 (03:35)
Creating the Main Layout Blocks pt. 2 (03:30)
Creating the Main Layout Blocks pt. 3 (03:00)
Laying Out the Banner Ad Blocks (04:48)
Getting Organized in the Layers Panel (05:20)
Finishing Up the Layout (07:40)
Adding Content to the Layout
Formatting the Overall Layout (05:52)
Building the Lead Story Box (06:43)
Building the Story 1 Box (04:40)
Building the Story 2 Box (02:10)
Building the Story 3 & 4 Boxes (04:25)
Building the Feature Box (02:11)
Creating Title Text (06:56)
Inserting Placeholder Text (04:23)
Formatting the Footer (04:04)
Inserting the Header (02:04)
Slicing a Photoshop Layout
Creating Slices by Hand (07:02)
Guide-Based Slices (04:12)
Layer-Based Slices (03:44)
Dividing Slices (04:50)
Slicing Apart the Layout pt. 1 (02:25)
Slicing Apart the Layout pt. 2 (03:20)
Slicing Apart the Layout pt. 3 (02:00)
Setting Slice Properties pt. 1 (02:52)
Setting Slice Properties pt. 2 (02:54)
Exporting a Photoshop Layout
Slice Export Settings (04:47)
Exporting a Table-Based Layout (02:05)
Viewing the Table Results (03:59)
Exporting a CSS-Based Layout (01:44)
Viewing The CSS Results (05:04)
Final Exporting & Results (02:42)
Replacing Text (03:12)
Formatting the Layout (03:52)
Conclusion
Wrap Up (01:16)
About the Author (00:36)
Link:
http://hotfile.com/dl/30168144/17eb3e8/VTC.Adobe.Photoshop.CS4.for.the.Web.part1.rar.html
http://hotfile.com/dl/30168145/1581950/VTC.Adobe.Photoshop.CS4.for.the.Web.part2.rar.html
http://hotfile.com/dl/30168143/9112be0/VTC.Adobe.Photoshop.CS4.for.the.Web.part3.rar.html
http://hotfile.com/dl/30168147/7f18b73/VTC.Adobe.Photoshop.CS4.for.the.Web.part4.rar.html
http://hotfile.com/dl/30168142/d987286/VTC.Adobe.Photoshop.CS4.for.the.Web.part5.rar.html
http://hotfile.com/dl/30168148/e21657e/VTC.Adobe.Photoshop.CS4.for.the.Web.part6.rar.html
http://hotfile.com/dl/30168146/9b8a2e5/VTC.Adobe.Photoshop.CS4.for.the.Web.part7.rar.html
Langganan:
Komentar (Atom)


